Threaded fastening design guide: joints, inserts and hardware
Learn when to use threaded fasteners, how to design bolted joints, tapped holes, and sheet metal or plastic inserts, and what mistakes to avoid.
Threaded fastening joins parts with bolts, screws, studs, nuts, tapped holes, and inserts so an assembly can be taken apart and put back together. Tightening the fastener creates a preload that clamps the parts and holds them by friction and bearing. This guide covers how to choose the right fastener style, design the joint, and avoid loosening, stripping, and corrosion.
What it is and when to use it
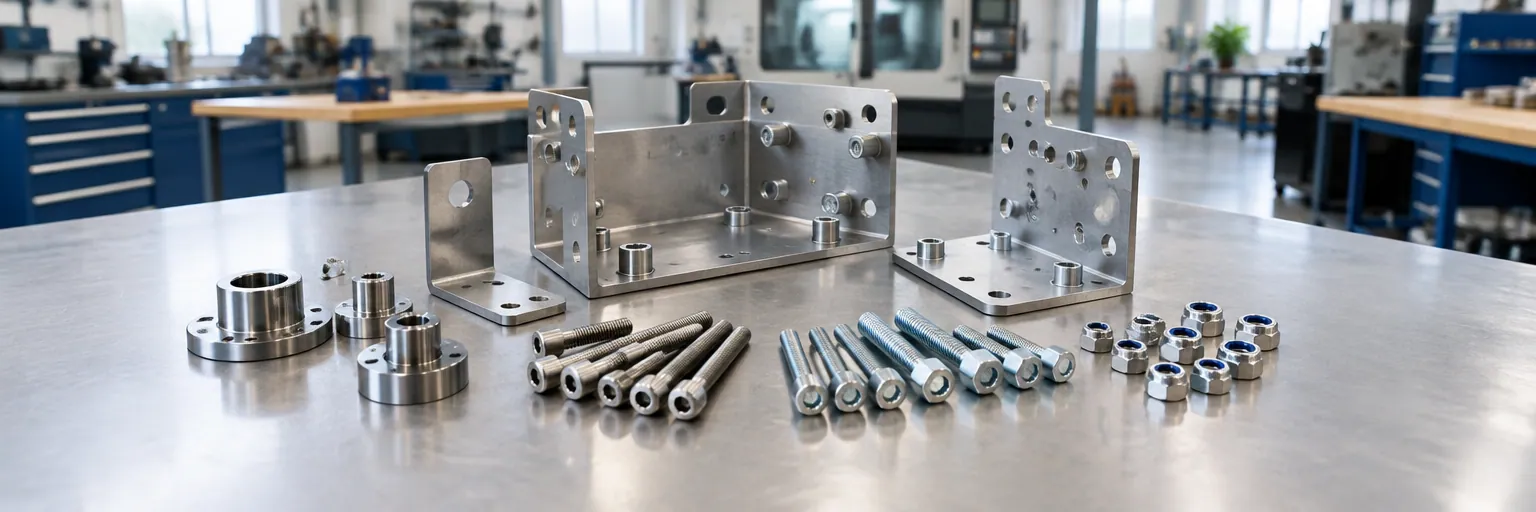
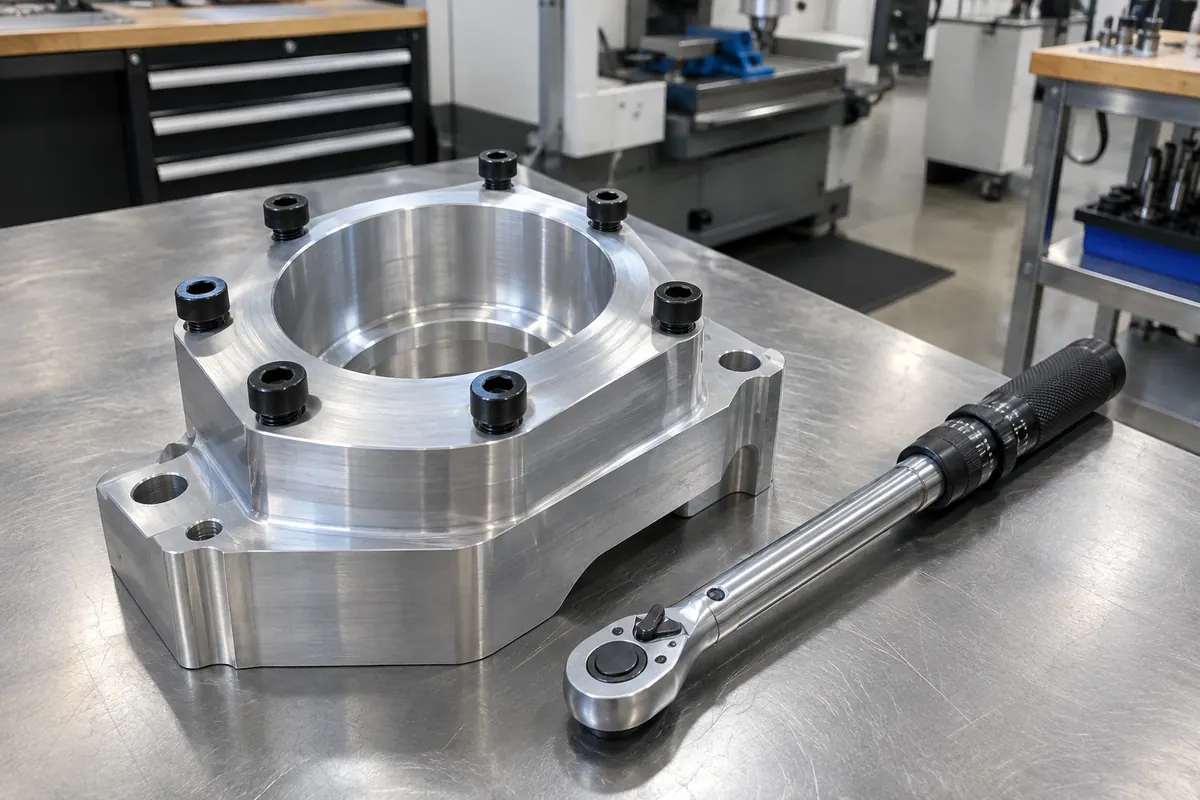
Threaded fastening is a mechanical joining method alongside riveting, press fitting, and snap-fit assembly. It uses hardware ranging from hex, socket, shear, carriage, and countersunk screws to lock nuts, nutplates, Belleville and lock washers, studs, threaded inserts, rivet nuts, self-clinching nuts, studs, and standoffs, and self-tapping screws for plastic. Shops install and tighten this hardware with torque wrenches, parallel-acting insertion presses, and heat-set insert tools.
Use threaded fasteners when an assembly must be opened for service, adjustment, repair, or upgrade. Where permanent structural integrity matters more than disassembly, use permanent fasteners like rivets. Also use rivets for permanent shear joints in thin sheet, press fits to hold shafts or bushings without separate hardware, and snap fits for rapid assembly of plastic housings.
Match the fastener type to your host material and tool access:
- Bolt and nut: Use where you can reach both sides of the joint and the load is heavy.
- Screw in a tapped hole: Use when the back of the part is closed.
- Threaded insert: Use when the host is plastic, composite, or a soft metal too weak for direct threads.
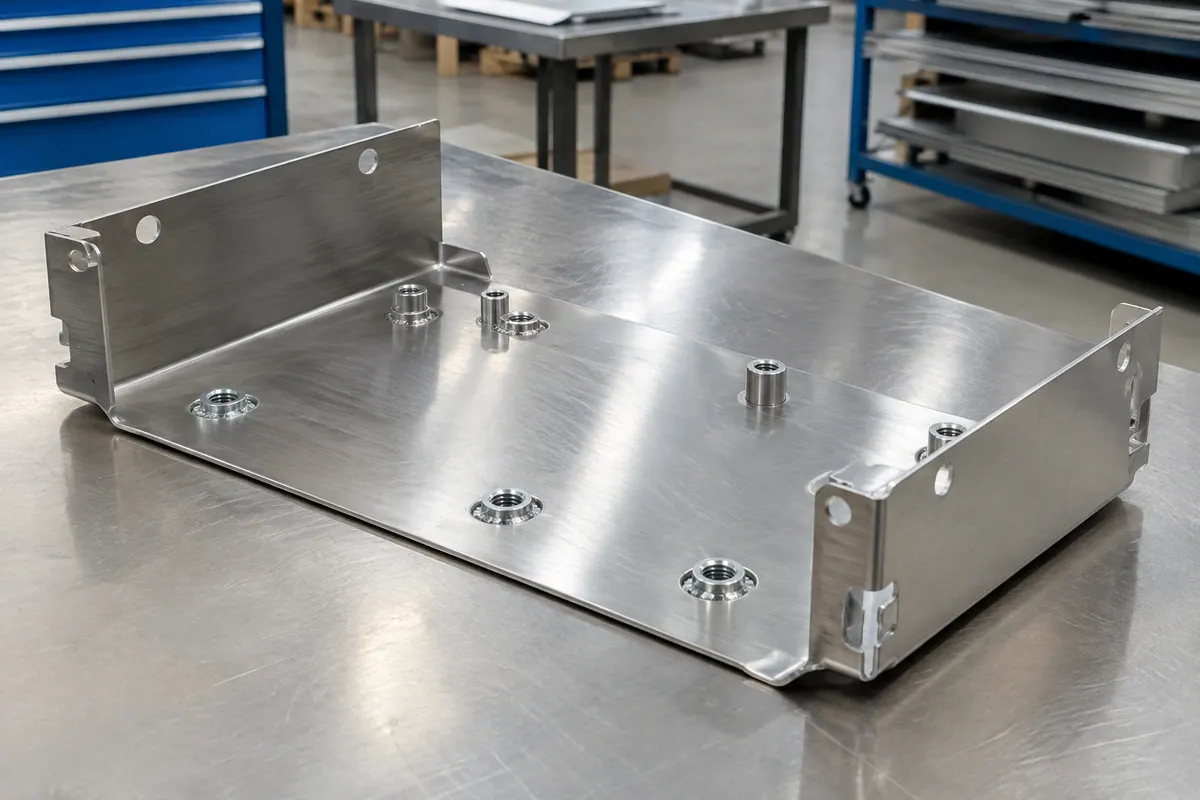
- Self-clinching nut, stud, or standoff: Press into ductile sheet metal that is too thin to tap, especially when loose hardware cannot be reached after a chassis or cabinet is assembled.
- Rivet nut (blind threaded insert): Use in panels where you can only reach one side, or in materials not ductile enough for self-clinching.
Prefer a larger number of ordinary-strength fasteners over a few high-strength ones. Choose coarse threads for general use, fine threads for higher loads and better torque locking, and extra-fine threads for hard materials and thin walls.
Designing bolted and tapped joints
Tighten bolts to a preload higher than the maximum applied tensile load. As a starting point for an unlubricated bolt with 150 ksi ultimate strength (representing 50 to 75 percent of theoretical yield), reference manual torque ranges are:
- 1/4-20: 54 to 81 inch-pounds
- 3/8-16: 205 to 308 inch-pounds
- 1/2-13: 42 to 64 foot-pounds
- 3/4-10: 117 to 176 foot-pounds
Adjust torque for friction and hardware type. Friction coefficients range from 0.04 to 1.10 depending on materials and lubricants; in quick torque formulas, use a torque coefficient of about 0.15 for steel on steel rather than the commonly assumed 0.2. Add the running torque of any locking device. Cut the table torque values in half for shear bolts, shear nuts, and waxed silver-plated nuts. Do not torque close to yield.
Follow these layout and geometry rules for the joint:
- Thread engagement: In softer metals like aluminum, published design guidance recommends a tapped hole engagement of 1.5 to 2.5 times the fastener diameter, or sizing from a pullout formula to develop full bolt strength. Confirm your shop's standard tap depths.
- Grip length: Select the bolt grip so that threads are never in bearing.
- Hole spacing and edge distance: Place hole centers at least 2 diameters from an edge (never less than 1.5 diameters) and 4 diameters apart.
- Surface parallelism: Keep bearing surfaces parallel within 2 degrees.
- Vibration locking: Secure the joint with a lock nut, a locking feature on the part, or a threadlocking adhesive rated for 200 to 450 degrees Fahrenheit.
Self-clinching hardware in sheet metal
Self-clinching nuts, studs, and standoffs cold-flow ductile sheet metal into an undercut around the fastener. These rules come from manufacturer published guidelines; always confirm tooling and hole tolerances with your sheet metal shop.
The host sheet must be ductile and softer than the fastener, typically by at least 20 points on the Rockwell B scale, so the sheet flows rather than crushing the fastener. Maximum host sheet hardness depends on the fastener material:
- Aluminum fastener: below HRB 50 (89 HB)
- Unhardened steel fastener: below HRB 60 (107 HB)
- 300 series stainless steel fastener: below HRB 70 (125 HB)
- Hardened steel fastener: below HRB 80 (150 HB)
- Hardened stainless steel fastener: below HRB 88 (183 HB); use specialty fasteners made for stainless sheet when clinching into stainless.
If the panel is non-ductile, such as a printed circuit board, plastic, or casting, use a blind insert, broaching fastener, flare-mount fastener, or bonded fastener instead.
Prepare the sheet and install the hardware carefully:
- Sheet thickness: The general minimum sheet thickness is 0.030 to 0.040 in (0.76 to 1.02 mm), though some specific fasteners work in sheets down to 0.008 in (0.20 mm).
- Hole preparation: Punch or drill a round mounting hole held to +0.003 / -0.000 in (+0.08 / -0.00 mm). Do not deburr, chamfer, or countersink the hole on either side; any broken edge must be at most 0.005 in (0.127 mm) because deburring removes metal needed to clinch the part.
- Punch-side installation: On punched panels 0.09 in (2.29 mm) or thicker, always install the fastener on the punch side. At 0.093 in (2.36 mm) and above, punch-to-die break clearance makes the die-side hole too large.
- Edge distance and access: Keep the hole centerline at least the manufacturer's minimum distance from the sheet edge to prevent bulging. You need access to both sides of the panel for the press punch and anvil, except for some 1/4 in (M6) or larger nuts that can be drawn in from one side with an impact-torque wrench.
- Pressing: Seat the shank squarely in the hole and squeeze with a parallel-acting press until the clinching ring is fully embedded and the shoulder contacts the sheet. Never hit the fastener with a hammer, and do not over-squeeze. Confirm optimum installation force by testing. As an example of published values, a Type S nut with a 2-56 (M2) thread in 5052-H34 aluminum takes 1500 to 2000 lb (6.7 to 8.9 kN) of installation force (2500 to 3500 lb in cold-rolled steel) and yields about 90 lb of pushout and 10 lbf-in of torque-out. In general, pushout force opposite the installation direction is roughly 5 to 10 percent of the installation force.
Threads and inserts in 3D-printed and plastic parts
Published service guidelines for 3D-printed and plastic parts favor metal inserts or specialty screws over direct standard threads.
For joints that will be assembled and taken apart repeatedly, use heat-set inserts, tap-in inserts, or embedded nuts. They install easily and provide metal-on-metal thread strength. Drill or size the pilot hole to the insert manufacturer's specification before installing. When pressing a heat-set insert in with a soldering iron, push it down slowly and avoid overheating, which melts the surrounding plastic.
For permanent or one-off assembly that will not be opened regularly, you can use self-tapping screws. Specify self-tapping screws made for plastic to limit radial stress and prevent the hole from bulging, delaminating, or cracking. Use the screw supplier's recommended pilot hole size; if none is given, size the pilot hole for 75 to 80 percent thread engagement. Drive the screw slowly and keep it perpendicular to the hole.
Standards to call out on drawings
Call out thread geometry, mechanical strength, and fastener dimensions using recognized standards on your drawings or bill of materials:
- Thread profile and tolerances: Use ASME B1.1 for unified inch threads, and ISO 68-1, ISO 261, and ISO 965-1 for metric threads.
- Mechanical properties: Specify steel bolt and nut strength grades using SAE J429 for inch hardware, or ISO 898-1 (bolts, screws, and studs) and ISO 898-2 (nuts) for metric hardware.
- Hex bolts and screws: Reference ASME B18.2.1, ISO 4014, or ISO 4017.
- Socket head, button, and countersunk screws: Reference ASME B18.3, ISO 4762, DIN 912, ISO 7380-1, or ISO 10642.
- Nuts and washers: Reference ISO 4032 for hex nuts and ISO 7089 or DIN 125 for plain washers.
What to watch out for
Avoid common failure modes in joint design, hardware selection, and finishing:
- Ineffective locking hardware: A helical spring lock washer flattens completely once the bolt is tight and provides no locking ability. Jam nuts are unreliable, and tooth washers scratch surfaces and start cracks. Nylon locking elements are damaged by reassembly and cannot be used above about 250 degrees Fahrenheit. Deformed-thread lock nuts last for about ten reuses.
- Overload, fatigue, and stripping: Short thread engagement strips soft host materials. Torquing a bolt too close to yield can exceed yield in service and unload the joint. Bolts cycled in tension typically break near the end of the thread. Never ask bolts to share a shear load with rivets or interference-fit pins.
- Hydrogen embrittlement: Electrolytic plating introduces hydrogen into carbon steel fasteners. Bake plated carbon steel fasteners for 23 hours at 375 degrees Fahrenheit, starting within 2 hours of plating.
- Temperature limits: Carbon and alloy steel bolts become brittle below minus 65 degrees Fahrenheit. In high-temperature service, the plating usually sets the limit; cadmium-plated parts under sustained stress can fail at temperatures as low as 325 degrees Fahrenheit.
- Corrosion and galling: Corrosion starts at the fastener. Keep joint materials close in the galvanic series, make the fastener the cathode, and insulate magnesium parts. Passivate stainless steel fasteners to prevent galling and thread freeze-up.
- Fastener quality: Watch out for counterfeit grade markings on bolts. In self-clinching hardware, poor heat treatment causes brittle cracking or soft fasteners that crush during pressing, and a dimensional variation of just 0.002 in (0.051 mm) on a 0.010 in (0.254 mm) feature can cut performance by 20 percent.
Design rules at a glance
| Rule | Value | Note | Source |
|---|---|---|---|
| Tapped hole thread engagement in soft metal (aluminum) | 1.5 to 2.5 x fastener diameter | Published design guide recommendation; or size by pullout formula for full bolt strength | [1] |
| Hole center to edge distance | 2 x diameter (1.5 x minimum) | General bolted joint layout rule | [1] |
| Hole center-to-center spacing | 4 x diameter | General bolted joint layout rule | [1] |
| Bearing surface parallelism | Within 2 degrees | Maximum angle between clamped bearing surfaces | [1] |
| Steel-on-steel torque coefficient | 0.15 | Use in quick torque formula instead of 0.2; overall friction coefficients run 0.04 to 1.10 | [1] |
| Threadlocking adhesive service temperature | 200 to 450 degrees Fahrenheit | Nylon locking elements stop at about 250 degrees Fahrenheit | [1] |
| Hydrogen embrittlement relief bake | 23 hours at 375 degrees Fahrenheit | For plated carbon steel fasteners; start within 2 hours of plating | [1] |
| Self-tapping screw pilot hole engagement in plastic | 75 to 80 percent | Starting point for printed or drilled holes when supplier size is unavailable | [2] |
| Self-clinching mounting hole diameter tolerance | +0.003 / -0.000 in (+0.08 / -0.00 mm) | Round punched or drilled hole; do not deburr or chamfer | [3] |
| Maximum broken edge on self-clinching mounting hole | 0.005 in (0.127 mm) | Deburring or countersinking removes metal needed for clinching | [3] |
| General minimum sheet thickness for self-clinching hardware | 0.030 to 0.040 in (0.76 to 1.02 mm) | Some specific fasteners install into sheet as thin as 0.008 in (0.20 mm) | [3] |
| Sheet thickness requiring punch-side self-clinching installation | 0.09 in (2.29 mm) and thicker | At 0.093 in (2.36 mm) and above, die-side break makes the hole too large | [3] |
| Sheet-to-fastener hardness difference (self-clinching) | At least 20 HRB points softer than fastener | Max host sheet: 89 HB (Al), 107 HB (steel), 125 HB (300 SS), 150 HB (hard steel), 183 HB (hard SS) | [3] |
| Self-clinching pushout force | 5 to 10 percent of installation force | Measured axially opposite to the direction of installation | [3] |
Common questions
- Do helical spring lock washers prevent bolts from vibrating loose?
- No. By the time a bolt is tightened, a helical spring lock washer is pressed flat and offers no locking ability. Use a lock nut (such as a deformed-thread lock nut, good for about ten reuses), a threadlocking adhesive within its 200 to 450 degree Fahrenheit range, or a mechanical locking feature on the part.
- Should I deburr or chamfer holes before pressing in self-clinching nuts or standoffs?
- No. Do not deburr, chamfer, or countersink the mounting hole on either side of the sheet. Deburring removes the metal next to the hole that must cold-flow into the fastener's undercut. Any broken edge on the hole must not exceed 0.005 in (0.127 mm).
- How deep should tapped threads be in aluminum?
- Published design guidance recommends a thread engagement depth of 1.5 to 2.5 times the fastener diameter in softer metals like aluminum, or calculating the depth from a pullout formula to match full bolt strength. Always verify standard tap depths with your machining shop.
- When should I use heat-set inserts instead of self-tapping screws in 3D-printed parts?
- Use heat-set inserts, tap-in inserts, or embedded nuts whenever the printed part will be assembled and disassembled repeatedly. Self-tapping screws made for plastic work well for quick, one-off assembly, but repeated removal damages the plastic threads.
- Why can't standard self-clinching fasteners be pressed into stainless steel sheet?
- A self-clinching fastener must be harder than the host sheet by about 20 points on the Rockwell B scale so the sheet metal cold-flows without crushing the fastener. Standard steel or 300-series stainless fasteners are not hard enough relative to stainless sheet; you must specify hardened specialty fasteners designed for stainless panels (suitable for sheets below HRB 88 / 183 HB).